System settings
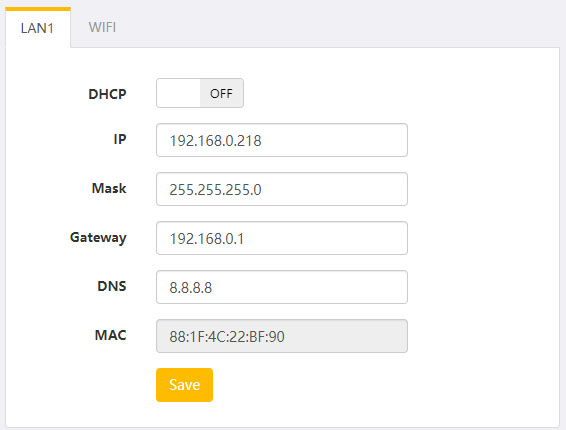
Wired Network Settings
A. After a fixed IP address is set and changed, the system automatically uses the new IP address to open the login page.
B. DHCP mode is also available. If you want to view the latest IP address, you need to obtain it from the OLED screen.
 Wireless Network Settings
A. Wifi is an external optional, using the specified chip model OF USB wireless card RLT8811 (drive free and support Linux operating system) .
B. After connecting USB wireless network card, turn ON in the “ON” menu (this setting cannot be saved if there is no USB device).
C. After saving the Settings, switch to another system page and return to this page. Click “Add” to select our wifi network and save the Settings.
D. Restart the system.
Note: The OLED screen preferentially displays the IP address of the wired network (if the cable is unplugged, it will display the IP address of the wireless network) .
Password settings
A. If we forget the password, we can only solve the problem by restoring factory Settings (or holding down the DEF key).
Auto reboot
A. Sync to PC: Set the system time synchronization button between the encoder and the visitor.
B. NTP synchronization: Synchronizes with the NTP server at each startup (the encoder must be able to access the Internet).
C. reboot time: set the automatic restart time of the system (usually not used). It can run stably for 7×24 hours. When the system uses complex functions, the scheduled restart can keep the system working in the best state.
Application scenarios
Due to the memory pre-allocation mechanism of SOC chips, the default memory allocation scheme may not meet all scenarios. You can change the memory allocation scheme based on actual scenarios. The default scenario meets most requirements(1080P).
System upgrade
A. For details, see “How to Upgrade“.
Port config
Static port: specifies the fixed port of the system service. It cannot be modified.
Reserve port: You can add a standby port for accessing corresponding services. In most cases, this port is unnecessary.
NAT port(Internet): this port is used to correctly display the “Playing address” on the “Output Setting” page when the encoder accesses the extranet after extranet mapping.
Network Test
Test button that tests the encoder to connect to the Internet.
Remote Assistance
When you encounter a problem that cannot be solved in the manual, you can apply for remote assistance from our engineers, click “Start Assistance”, obtain the random authorization code from 0 to 999, and send the authorization code to customer service.
Note:Please read the instructions carefully again, confirm that you cannot solve the problem, and then apply to us for remote assistance.


